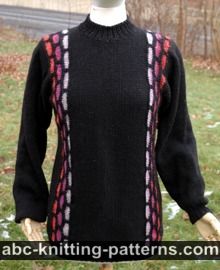

Free Sweater Knitting Pattern

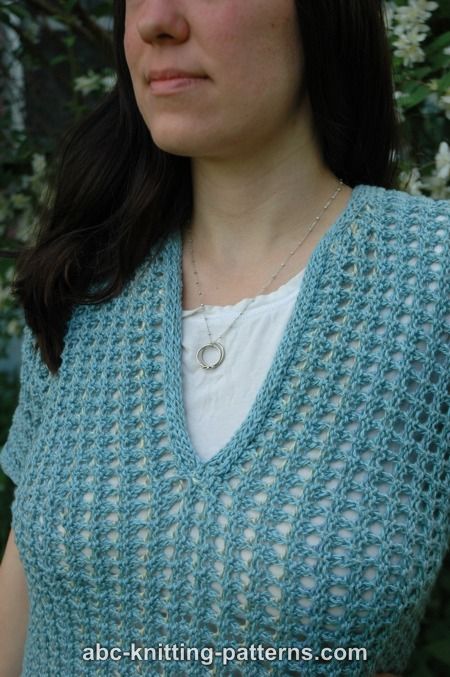
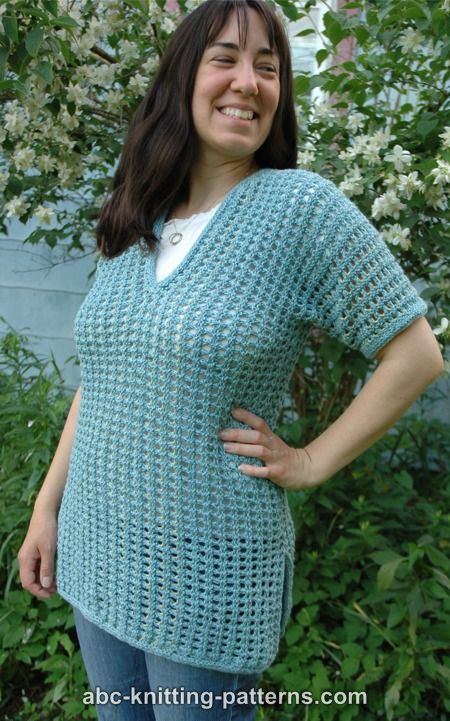
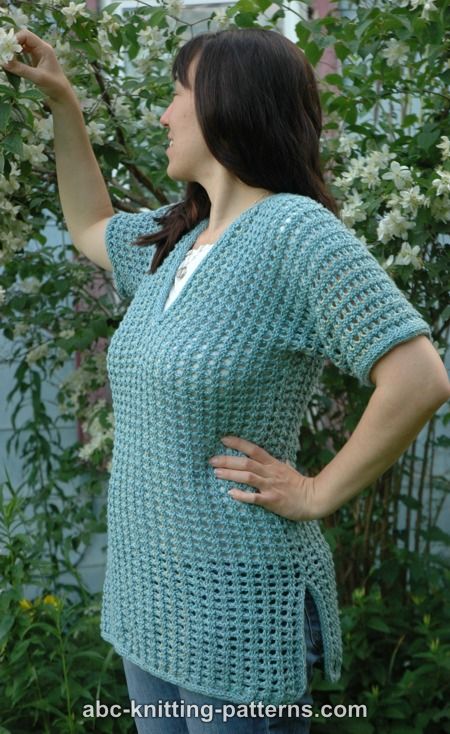
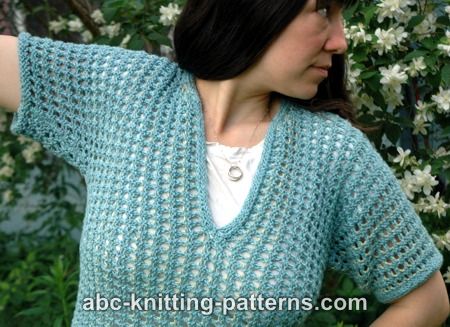
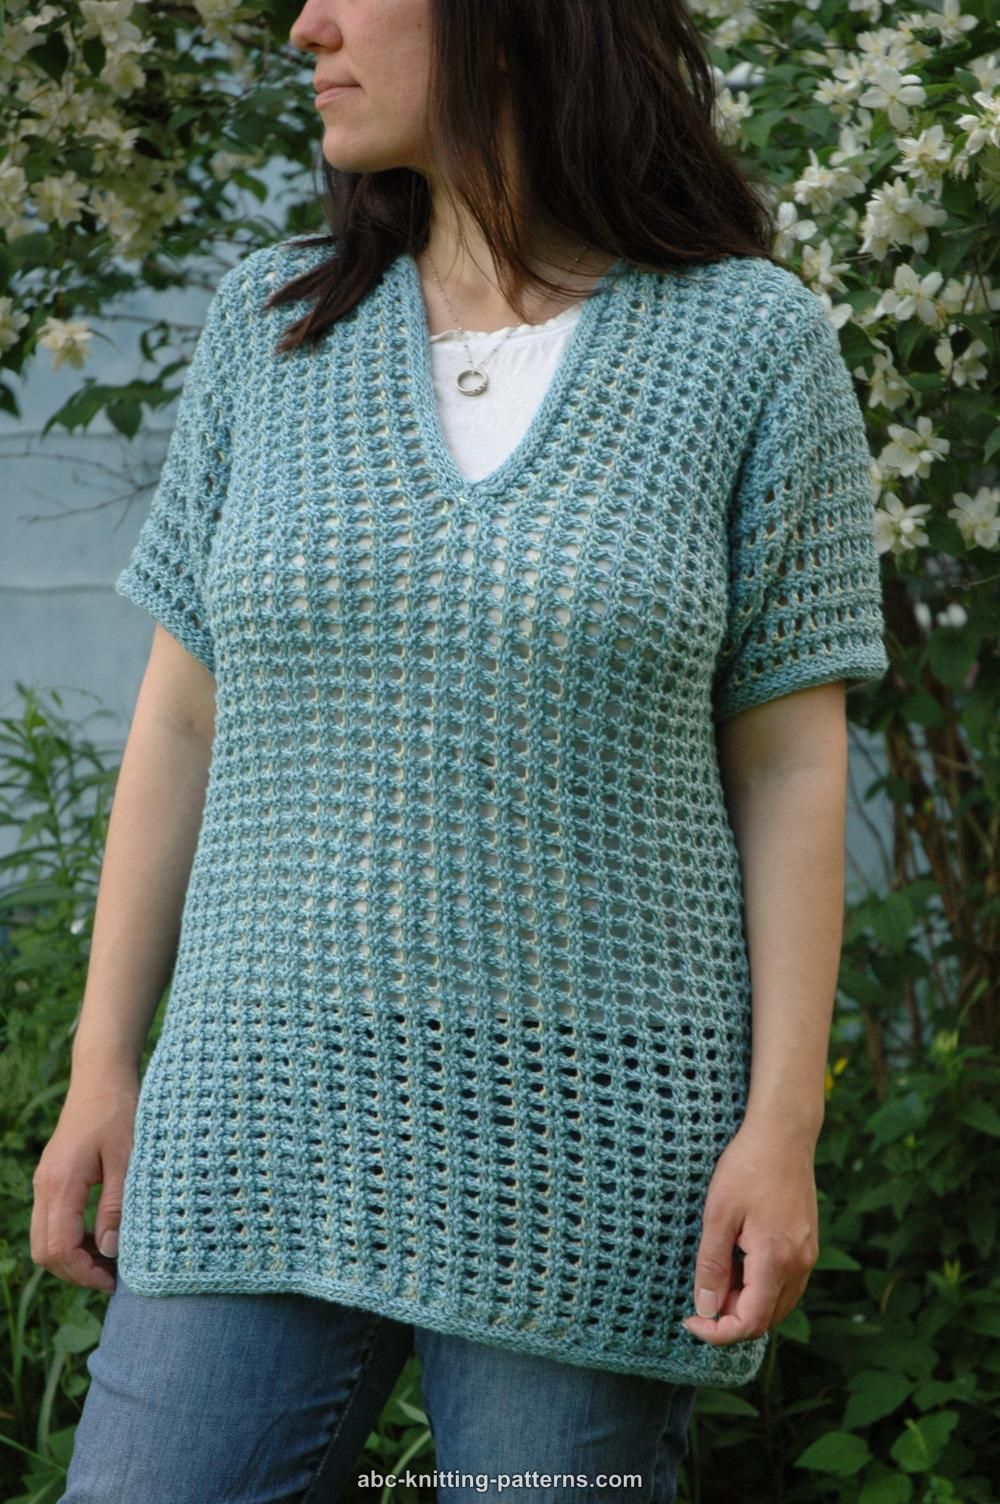
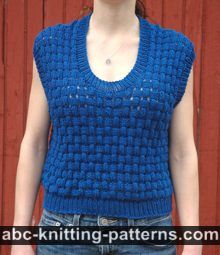
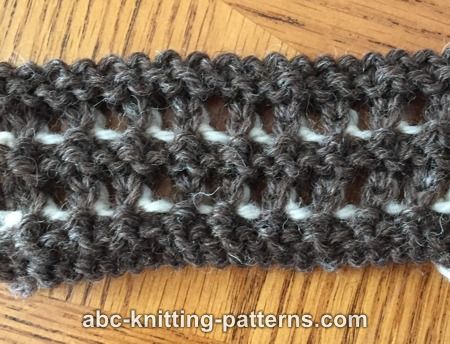
The remarkable thing about this summer sweater is the mesh pattern that I chose. It resembles filet crochet, even though it is knitted, and it's very easy to work. However, the special thing about it is that it's actually two-color. The second color is mostly covered by the first color, so you get only glimpses of it as you move around. This is why I called it the "subtle sweater". For the sweater I made, I chose similar colors to enhance the effect. You can also use contrasting colors (see swatch in brown and white below).
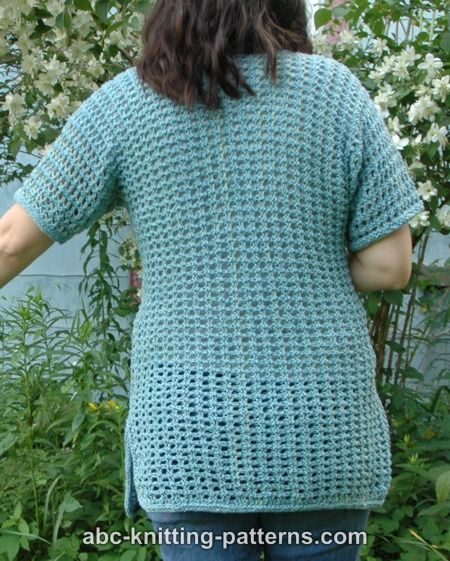
The sweater is worked sideways, cuff-to-cuff, and features side seams. The neckline, sweater hem, including side slits, and cuffs are finished with applied I-cord.
Sizes: S (M, L, XL, 2X)
FINISHED MEASUREMENTS
Chest: 34 [38, 42, 46, 50] inches (86 [96, 106, 117, 127] cm)
Length: 25 [26, 27, 27.5, 28] inches (63 [65, 67, 69, 70] cm)
Materials: Berroco (affiliate link) Linsey worsted weight yarn (64% Cotton, 36% Linen), 114 yards (104 meters) / 50 gr, color 6551 – 6 (7, 8, 10, 12) skeins (MC)
Berroco (affiliate link) Linsey worsted weight yarn (64% Cotton, 36% Linen), 114 yards (104 meters) / 50 gr, color 6506 – 2 (2, 3, 3, 3) skeins (CC)
Needles: US 5 (3.75 mm) straight and long circular OR SIZE NEEDED TO OBTAIN GAUGE
Gauge for mesh pattern:
16 sts x 28 rows = 4” x 4” (10 cm x 10 cm)
Pattern Notes
Mesh Pattern
Even number of sts.
Row 1 (RS): purl
Row 2: knit
Row 3: k 2, *sl 1 wyib, k 1, repeat from *
Row 4: *k 1, sl 1 wyif, repeat from * to last 2 sts, k 2.
Row 5: k 1, * yo, k2tog, repeat from * to last st, k 1.
Row 6: purl
Repeat rows 1-6
Color changes
Rows 1-2, 5-6 – MC
Rows 3-4 - CC
Abbreviations:
k - knit
p - purl
ssk - slip, slip, knit (left leaning decrease)
k2tog – knit 2 together (right leaning decrease)
M1 (Make 1 increase) - I used the increase described by Elizabeth Zimmerman: Make a backward loop over the right-hand needle and in the next row knit (purl) it as a regular stitch.
RS – right side
WS – wrong side
w&t - wrap and turn
sl 1 wyib – slip 1 with yarn in back
sl 1 wyif – slip 1 with yarn in front
Selvedge stitches: first st slip as if to knit, last st purl
Sweater
The sweater is knitted in a mesh stitch back and forth, sideways (cuff-to-cuff) as one piece, starting from the left sleeve, then the body of the sweater, then the right sleeve. There are side-to-sleeve seams. The sweater is finished with applied I-cord. The sweater has short 5” (12 cm) sleeves. If you would like to change the length of the sleeves, work more of less rows for each sleeve. If you would like to change the length of the sweater, cast on more or less sts as instructed at the beginning of the Body section.
Left Sleeve
Cast on 50 (58, 66, 70, 74) sts (there are 2 selvedge sts included) and work mesh pattern (see above).
Work 36 rows, increasing the sleeve as follows:
increase by 1 st at the beginning and the end of the row in every 8th row 0 (0, 0, 3, 3) times;
increase by 1 st at the beginning and the end of the row in every 6th row 0 (2, 6, 6, 6) times;
increase by 1 st at the beginning and the end of the row in every 4th row 8 (6, 0, 0, 0) times;
increase by 1 st at the beginning and the end of the row in every 2nd row 2 (0, 0, 0, 0) times;
Body
Row 37: at the end of this row cast on 70 (71, 72, 72, 72) sts. At the end of the next row, cast on the same amount of sts. These are body stitches, which form the front and the back. If you would like a longer jacket, you need to cast on more stitches (the same amount for front and for back). Total stitch count is now 210 (216, 222, 224, 228).
Work 52 (58, 64, 70, 76) rows. This is the left shoulder rows.
Back Neck Shaping
Work first 105 (108, 111, 112, 114) sts of RS row. Transfer the rest of the stitches to another circular needle. Continue to work the back stitches only. Decrease by 1 st in every RS row 4 (4, 6, 6, 6) times by working k2tog (2 sts before the selvedge st) at the end of the row. Total 8 (8, 14, 14, 14) rows.
Work 20 (24, 14, 14, 18) more rows.
Increase by 1 st in every RS row 4 (4, 6, 6, 6) times by working m1 at the end of the row. Total 8 (8, 14, 14, 14) rows. Set aside.
Front Neck Shaping
Work the sts that were transferred to an additional needle. Transfer the stitches to the working needle and bind off 7 (7, 7, 9, 9) sts at the beginning of the row. Decrease by 1 st in every RS row 5 (5, 7, 7, 7) times by working ssk (2 sts after the selvedge st) at the beginning of the row. Total 10 (10, 14, 14, 14) rows.
Work 6 (8, 4, 4, 6) rows.
Bind off 30 sts at the beginning of the row for the front opening.
Work 6 more rows. At the end of the 6th row cast on 30 sts.
Work 6 (8, 4, 4, 6) rows.
Increase by 1 st in every RS row 5 (5, 7, 7, 7) times by working m1 at the beginning of the row. Total 10 (10, 14, 14, 14) rows. At the end of the last row cast on 7 (7, 7, 9, 9) sts.
Right Shoulder
Continue to work back and front again. Work RS row starting from back, then continue over the cast on sts of the right neck and then front sts. The stitch count should be 210 (216, 222, 224, 228) sts again.
Work 52 (58, 64, 70, 76) rows. This is the right shoulder rows.
Work next RS row. Bind off 70 (71, 72, 72, 72) sts at the beginning of the next row. Work to the end of the row. Turn. Bind off 70 (71, 72, 72, 72) sts at the beginning of the row. Work to the end of the row. This is the 1st sleeve row.
Sleeve
Work 36 rows, decreasing the sleeve as follows:
decrease by 1 st at the beginning and the end of the row in every 2nd row 2 (0, 0, 0, 0) times;
decrease by 1 st at the beginning and the end of the row in every 4th row 8 (6, 0, 0, 0) times;
decrease by 1 st at the beginning and the end of the row in every 6th row 0 (2, 6, 6, 6) times;
decrease by 1 st at the beginning and the end of the row in every 8th row 0 (0, 0, 3, 3) times;
Total after the decreases 50 (58, 66, 70, 74) sts.
Bind off.
Finishing
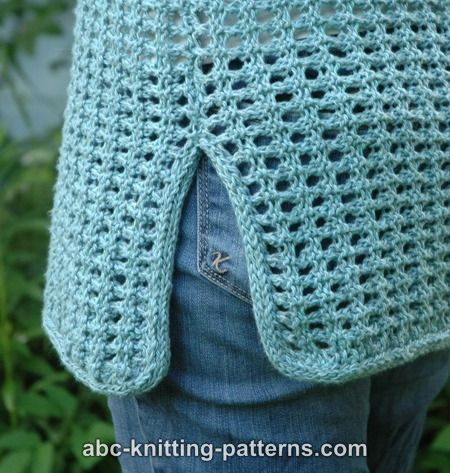
Sew sleeve and side seams, leaving 6” (15 cm) at the bottom unsown for the side slits.
Work applied I-cord along the bottom of the sweater and along the slit’s sides.
Work applied I-cord along the front center and neckline, starting from the center of the back.
Work applied I-cord along the bottom of the sleeves.
See video instructions for knitting applied I-cord
Enjoy!