
Free Doll Dress Crochet Pattern

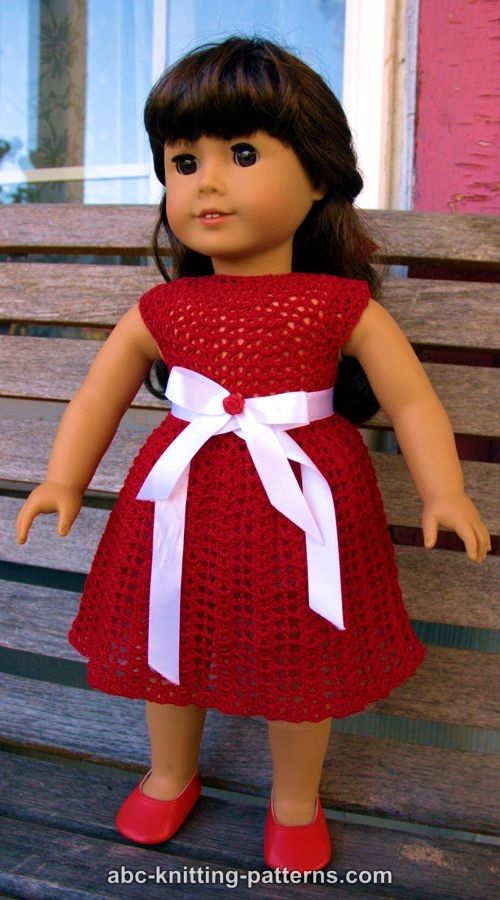
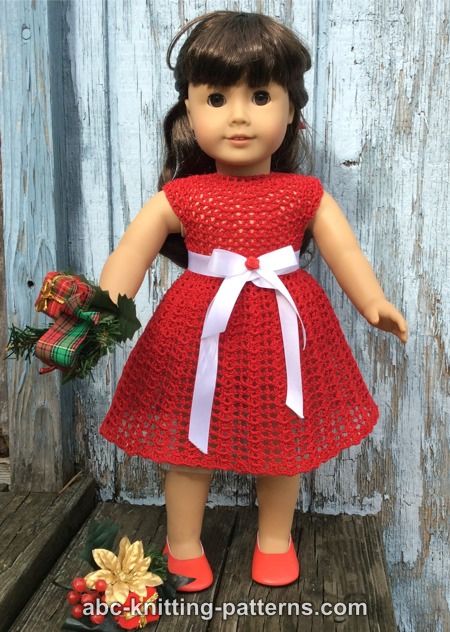
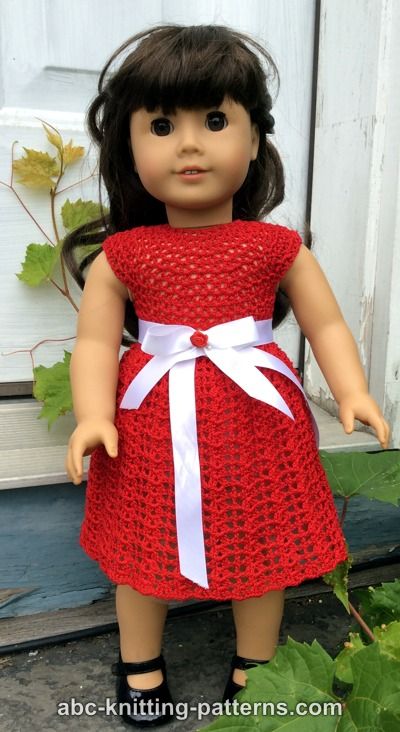
I planned this as a Christmas dress for the doll. It fits the role of an elegant evening dress your doll can wear to a fancy Yule party. Don’t send her out caroling in it, it’s a little light for that! With a different choice of yarn color and accessories, it would make a great summer dress too.
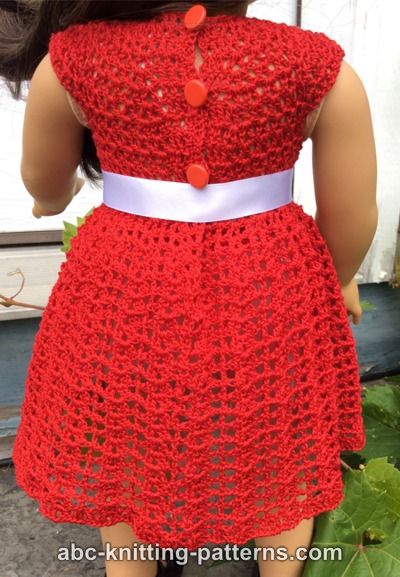
The dress is crocheted from the top down, seamlessly. It features a back opening.
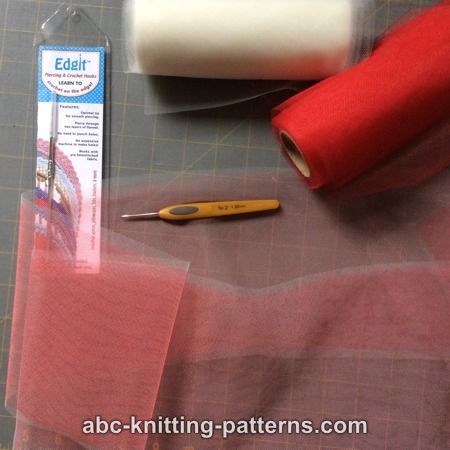
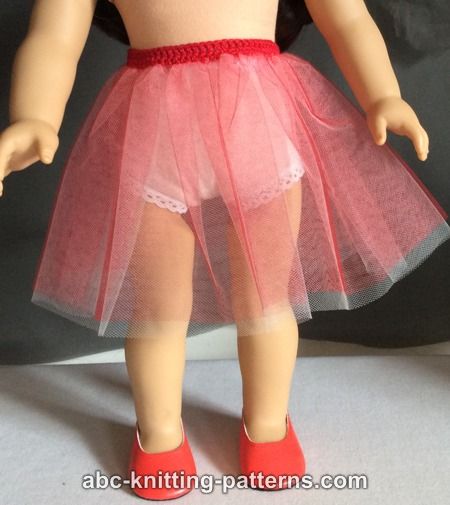
I recently acquired an “EdgIt” hook, which is like a small crochet hook except it features a sharp, needle-like end. You can use it to crochet onto the edge of fabric. I used it to make a tulle underskirt. The underskirt helps set the skirt off. If you use a contrasting fabric color, it opens up some interesting possibilities.
Materials: Aunt Lydia (affiliate link)'s Classic Crochet Thread size #10 (100% mercerized cotton), color red – 1 ball
3 small buttons for the dress, one small flat button for the underskirt.
Tulle for the underskirt (2 pieces 6” x 36”).
Satin 1/2" wide white ribbon 1 yard, a small red rose and plastic snap for the decorative belt.
Hook: 0 (1.75 mm) OR SIZE NEEDED TO OBTAIN GAUGE
“EdgIt” hook for the underskirt
Gauge: 28 dc = 4" (10 cm)
Abbreviations and special stitches:
Dc - double crochet
Sc - single crochet
Ch - chain
V-stitch - (1 dc, ch 1, 1 dc) in the same indicated stitch or space
V-stitch in V-stitch - V stitch in the ch-1-space of the V-stitch
Sl st - slip stitch
W-st - (dc, ch 1) twice, dc in the same indicated stitch or space
2-2 Shell - 2 dc in a stitch, ch 1, 2 dc in the same indicated stitch or space
2-2 Shell in the 2-2 Shell = 2-2 Shell in the ch-1-space of the 2-2 Shell
Dress
The Dress is worked top-down side-to-side to the hip line, leaving an opening at the back, then in rounds, turning at the end of each round. The button band is added afterwards.
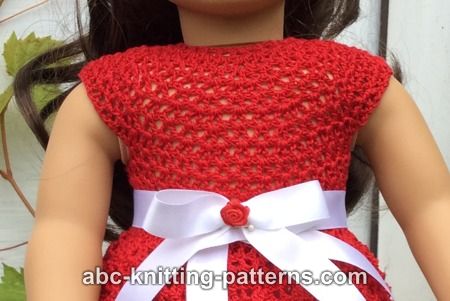
Yoke
Chain 49.
Row 1: ch 3 (counts as 1 dc), insert hook in the 5th ch from the hook, * 1 dc in the chain, ch 1, skip the next chain - repeat from * 11 times, V-st in the next chain, *ch 1, skip the next chain, 1 dc in the next chain - repeat from * 11 times to the last 2 chains, 1 dc in each of the last 2 chains. Turn.
Row 2: ch 3 (counts as 1 dc), 1 dc in each of the next 2 dc, *V-stitch in chain-1-space repeat from * to the last 3 sts (23 V-stitches), 1 dc in each of the last 3 dc. Turn
Row 3: ch 3 (counts as 1 dc), 1 dc in each of the next 2 dc, V-st in V-st, W-st in the next V-st, * V-st in each of the next 4 V-sts, W-stitch in the next V-st - repeat from * 4 times, V-st in last V-st, 1 dc in each of the last 3 dc. Turn.
Row 4: ch 3 (counts as 1 dc), 1 dc in each of the next 2 dc, V-st in each chain-1-space across (=28 V-sts), 1 dc in each of the last 3 dc. Turn.
Row 5: ch 3 (counts as 1 dc), 1 dc in each of the next 2 dc, *W-st in V-st, V-st in each of the next 3 V-sts - repeat from * 3 times, W-st in the next V-st, V-st in each of the next 2 V-sts,
*W-st in V-st, V-st in each of the next 3 V-sts - repeat from * 3 times, W-st in the last V-st, 1 dc in each of the last 3 dc. Turn.
Row 6: ch 3 (counts as 1 dc), 1 dc in each of the next 2 dc, V-st in each chain-1-space across (=36 V-sts), 1 dc in each of the last 3 dc. Turn.
Row 7: ch 3 (counts as 1 dc), 1 dc in each of the next 2 dc, *W-st in V-st, V-st in each of the next 3 V-sts - repeat from * 4 times, W-st in the next V-st, V-st in each of the next 2 V-sts,
*W-st in V-st, V-st in each of the next 3 V-sts - repeat from * 4 times, W-st in the last V-st, 1 dc in each of the last 3 dc. Turn.
Row 8: ch 3 (counts as 1 dc), 1 dc in each of the next 2 dc, V-st in each chain-1-space across (=46 V-sts), 1 dc in each of the last 3 dc. Turn.
Divide for Sleeves and Bodice
Row 9: ch 3 (counts as 1 dc), 1 dc in each of the next 2 dc, V-st in each of the next 6 V-sts, chain 7, skip the next 10 V-sts, V-sts in each of the next 14 V-sts, chain 7, skip the next 10 V-sts, V-st in each of the next 6 V-sts, 1 dc in each of the last 3 dc. Turn.
Row 10: ch 3 (counts as 1 dc), 1 dc in each of the next 2 dc, V-st in each of the next 6 V-sts, *1 dc in the first chain of the ch-7-space, ch 1, skip the next chain - repeat from * 3 times, 1 dc in the last chain of the ch-7-space, V-st in each of the next 14 V-stitches, *1 dc in the first chain of the ch-7-space, ch 1, skip the next chain - repeat from * 3 times, 1 dc in the last chain of the ch-7-space, V-st in each of the next 6 V-stitches, 1 dc in each of the last 3 dc. Turn.
Row 11: ch 3 (counts as 1 dc), 1 dc in each of the next 2 dc, V-st in each of the next 6 V-sts, V-st in each of the ch-1-space (3 V-sts), V-st in each of the next 14 V-sts, V-st in each of the next ch-1-space (3 V-sts), V-st in each of the next 6 V-sts, 1 dc in each of the last 3 dc. Turn. (=32 V-sts)
Repeat row 11 two more times.
Skirt
Row 14/1 (eyelet row): ch 3 (counts as 1 dc), *1 dc in the next stitch, chain 1, skip the next stitch - repeat from * 50 times, 1 dc in the last st.
Row 15/2: Chain 3 (counts as 1 dc), 1 dc in the ch-1-space, *V-st in the next ch-1-space, ch 1, skip the next dc, 1 dc in the next ch-1-space, chain 1, skip the next dc - repeat from * across, V-st in the last ch-1-space, 1 dc in each of the last 2 dc. Turn.
Row 16/3: ch 3 (counts as 1 dc), *V-st in V-st, ch 1 over ch-1-space, 1 dc in the dc, ch 1 over ch-1-space - repeat across, 1 dc in the last dc. Turn.
Row 17/4: ch 3 (counts as 1 dc), 1 dc in the next dc, * 2-2 shell in V-st, ch 1 over ch-1-space, 1 dc in the next dc, ch 1 over ch-1-space - repeat from * across, 2-2 shell in the last V-st, 1 dc in each of the last 2 dc. Turn.
Rows 18-19/5-6: ch 3 (counts as 1 dc), 1 dc in the next dc, * 2-2 shell in 2-2 shell, ch 1 over ch-1-space, 1 dc in the next dc, ch 1 over ch-1-space - repeat from * across, 2-2 shell in the last 2-2 shell, 1 dc in each of the last 2 dc. Turn.
Finishing row 19, join into round with a slip stitch. Turn.
You will work in the round, along the right side and along the wrong side in turns.
Round 1: ch 4 (counts as 1 dc and ch 1), skip 1 dc *2-2 shell in 2-2-shell, ch 1 over ch-1-space, 1 dc in the dc, ch 1 over ch-1-space - repeat from * across, 2-2 shell in the last 2-2- shell, ch 1, skip 1 dc, 1 dc in the last dc, join with slip stitch. Turn. Repeat round 1 fifteen more times or to desired length.
The last round: ch 3, *2-2-shell in dc, 2-2-shell in 2-2 shell - repeat from * across, join with slip stitch. Tie off, cut yarn.
Button Band
Fasten thread to the upper corner of the right edge, work a row of sc along the edge downwards, continue along the left edge upwards. After you pass the eyelet row, *chain 3, skip 3 stitches, work 7 sc in the edge - repeat 2 times, chain 3, sc in the corner. Tie off.
Belt (optional)
Chain 160, turn, sc in each chain across. You can insert the belt into eyelet row, or make a belt with a satin ribbon.
Finishing
Weave in thread ends. Press the dress. Sew on 3 buttons on the right button band. Insert the belt into eyelets of the belt row.
Satin Ribbon Belt
Cut the ribbon into 2 pieces – 12” and 24” long. Fold the 12” long piece into a bow, sew the bow in the center with several stitches. Sew on/glue a small flower onto the stitches.
Sew the ready bow onto the 24” piece, approximately 6 1/2” from one of the ends, this will be the right side of the belt. On the back (wrong side), under the bow, attach the stud (the part of the snap with the protruding part). Measure 11” from the stud (for AGD; 10” for a Journey Girl) and sew on the socket (the part with the hole) onto the right side of the ribbon belt.
Tulle Underskirt
Cut 2 pieces of tulle measuring 6” x 36”. The best way is to use tulle on bobbin, it’s already 6” wide. (photo2)
Position the pieces one over the other, align the edges.
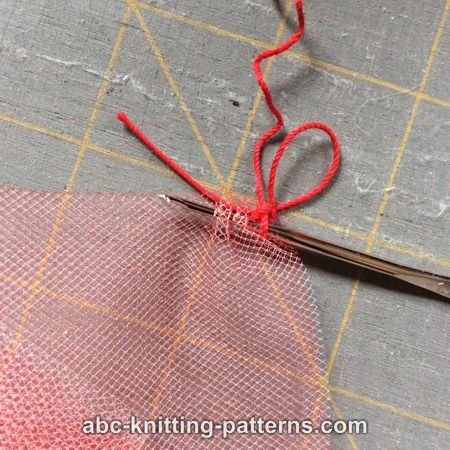
Row 1: Insert the “EdgIt” hook into the upper right corner of the pieces. Yarn/thread over, draw thread through the fabric, thread over, draw thread through the loop. Thus you fasten the thread to the skirt.
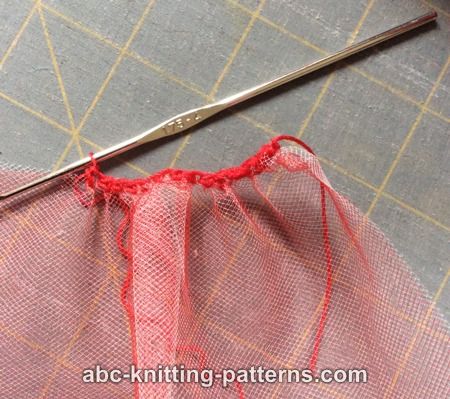
Insert the hook in the fabric, pierce the fabric with the hook 3 times along the edge, to form a ruffle (photo1), thread over, draw thread through all folds/gathers, thread over, draw thread through both loops on the hook. Essentially, you are working a single crochet stitch. Continue in the same way along the upper edge of the fabric.
When your piece is 10 ½” (for AG) or 10” (for JG), turn. If you have some fabric remaining, cut it off.
From row 2 you can work with a regular 1.75 mm hook.
Row 2: ch 1, work a row of sc back (1 sc in each sc). Turn.
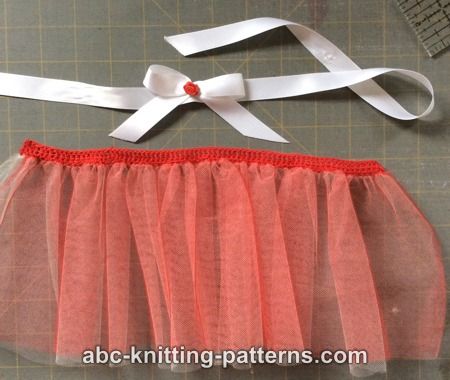
Row 3: ch 4 (this will be a button loop), 1 dc in every sc across. Tie off. Cut thread.
Weave in the ends of the thread.
Sew on a small flat button.

| Patterns: | Crochet >> Doll Clothes >> 18-inch Dolls |
| Difficulty Level: | 3-Intermediate |
| Technique: | In-the-round Lace Seamless Top-Down |
| Yarn Weight: | Thread |
| Yarn Brand: | Aunt Lydia's |