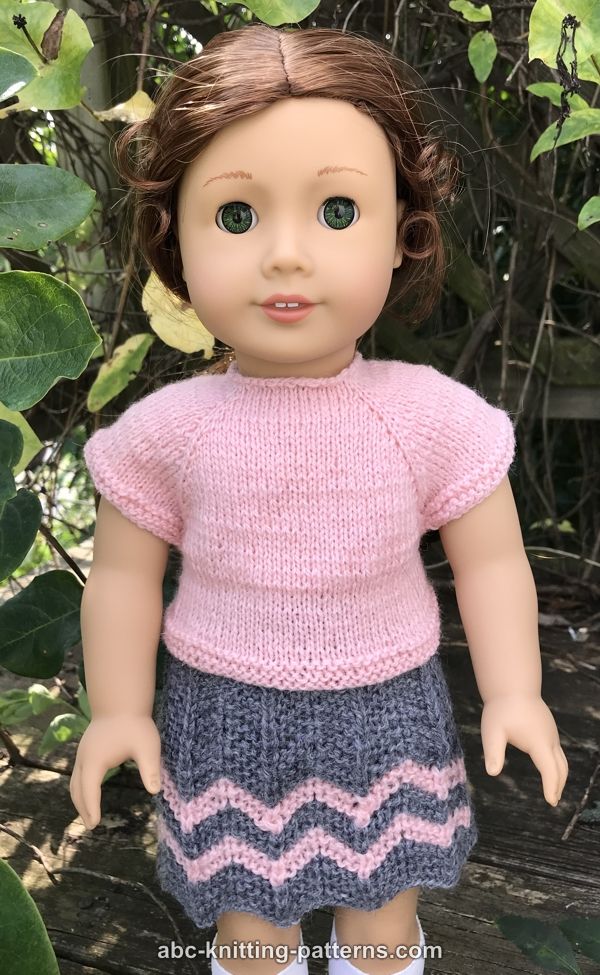

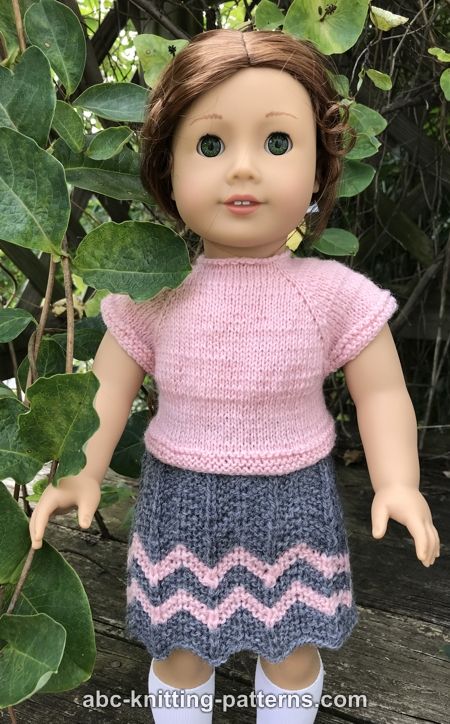
Free Doll Top Knitting Pattern

This seamless top is worked top-down back-and-forth with short raglan sleeves and button band on the back.
Skills Required/Techniques Used:
-Knit & purl, cast on & bind off
-Increasing
Materials: Knit Picks (affiliate link) Palette fingering weight 100% wool yarn 231 yds (210 m)/ 50 g – 1 ball
Needles: US #1.5 (2.50 mm) circular OR SIZE NEEDED TO OBTAIN GAUGE
Gauge in stockinette st: 30 sts x 40 rows = 4" x 4" (10cm x 10cm)
Notions:
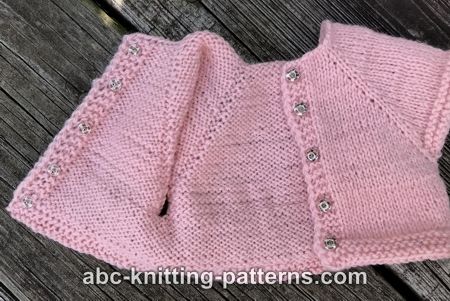
5 sew-on metal/or plastic snaps, size 2/0
4 stitch markers
yarn/tapestry needle
Sewing needle and thread of color matching the yarn for attaching the snaps
Abbreviations:
K – knit
P – purl
St – stitch
Sts – stitches
co – cast on
RS – right side
WS – wrong side
m 1 - make 1 increase - I used the increase described by Elizabeth Zimmerman: make a backward loop over the right-hand needle and in the next row/round purl/knit it as a regular stitch.
bb – button band
Pattern Notes:
Stockinette Stitch:
Row 1 (RS) - knit
Row 2 (WS) - purl
Repeat 2 rows
Garter stitch:
All rows knit
The selvedge/edge stitches are worked as follows: slip the first stitch knitwise and purl the last one.
Raglan increases: Increase for raglan by making 1 st (m1) on each side of indicated, marked, stitch in every right side (RS) row.
Button Band (bb) is worked in garter stitch on 3 stitches in the beginning and in the end of each row.
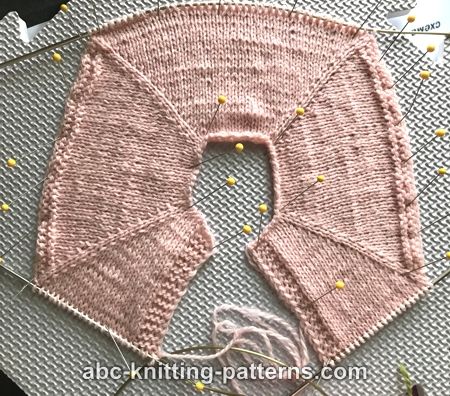
Top
The top is worked top-down back-and-forth with short raglan sleeves and button band on the back.
Cast on 52 sts. These include: 1 edge - 3 button band - 4 right back - 1 raglan - 10 right sleeve - 1 raglan - 12 front - 1 raglan - 10 left sleeve - 1 raglan - 4 left back - 3 button band - 1 edge. (=52 sts)
You might find helpful to place a stitch-marker before each raglan stitch and slip them while working.
Row 1 (RS): sl 1, k50, p1.
Row 2 (WS): sl 1, k3, p44, k3, p1.
Row 3 and all RS rows: sl 1, knit all sts till the first raglan st /marker, m1, slip the marker, k1 (raglan st), m1, knit all sts till the second raglan st/ marker, m1, slip the marker, k1 (raglan st), m1, knit all sts till the third raglan st/marker, m1, slip the marker, k1 (raglan st), m1, knit all sts till the forth raglan st/marker, m1, slip the marker, k1 (raglan st), m1, knit all sts to the last st, p1.
In every RS row the number of sts will increase by 8:
Row 3: 52+8=60 sts
Row 5: 60+8=68 sts
Row 7: 68+8=76 sts
Row 9: 76+8=84 sts
Row 11: 84+8=92 sts
Row 13: 92+8=100 sts
Row 15: 100+8=108 sts
Row 17: 108+8=116 sts
Row 19: 116+8=124 sts
Row 21: 124+8=132 sts
Row 23: 132+8=140 sts
Row 25: 140+8=148 sts
Row 27: 148+8=156 sts
Row 4 and all WS rows through row 26: sl1, k3, purl all sts to the last 4 sts, slipping the markers, k3, p1.
Work 27 rows.
Row 28 (WS): sl1, k3, p18, k36, p40, k36, p18, k3, p1.
Row 29 (RS): as row 3. (=164 sts)
Row 30 (WS): sl1, k3, p19, k38, p42, k38, p19, k3, p1. Remove markers.
Divide for sleeves and bodice:
Row 31 (RS): sl 1, k 22, bind off 38, k42, bind off 38, k22, p1. (=88 sts)
Row 32 (WS): sl1, k3, p19, co1, p42, co1, p19, k3, p1. (=90 sts)
Row 33 (RS): sl1, k88, p1.
Row 34 (WS): sl 1, p89
Repeat rows 33-34 four more times.
Work 6 more rows in garter stitch, all rows: sl 1, k 88, p1. Bind off. Cut yarn.
Finishing:
Weave in yarn ends. Sew on 5 snaps on the button band.
Enjoy!
Pattern was updated on August 28, 2018.
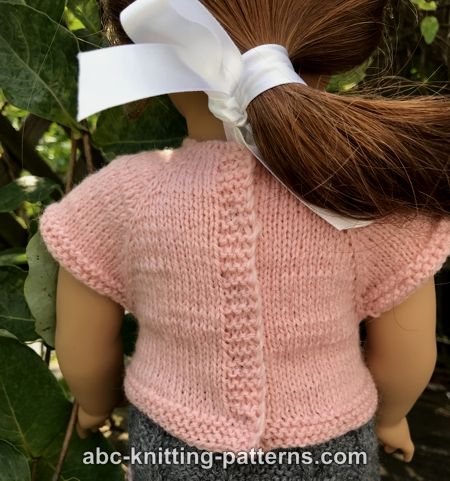

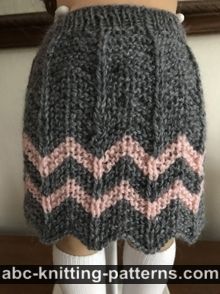
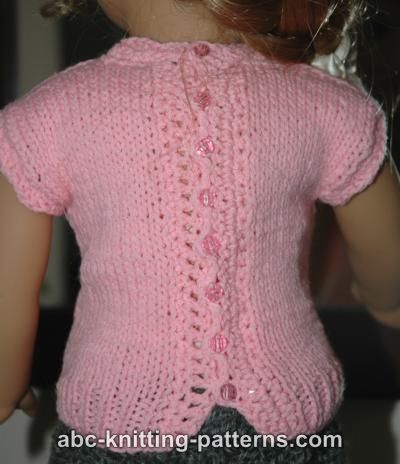
Back of the top.
| Patterns: | Knit >> Doll Clothes >> 18-inch Dolls |
| Difficulty Level: | 2-Easy |
| Yarn Weight: | Sport |