
Free Doll Dress Knitting Pattern

All kinds of fancy doll outfits are well and good, but sometimes you're just looking for a simple workaday garment that you can knit quickly and then decorate to taste. This is my offering.
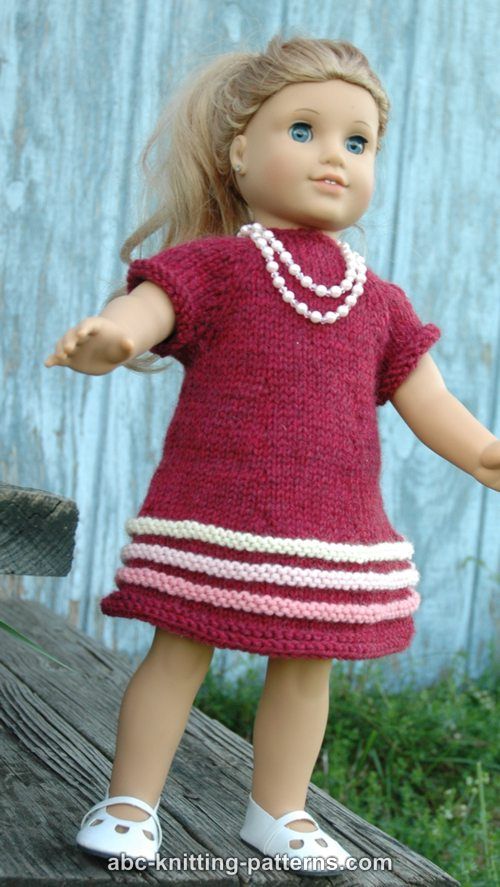
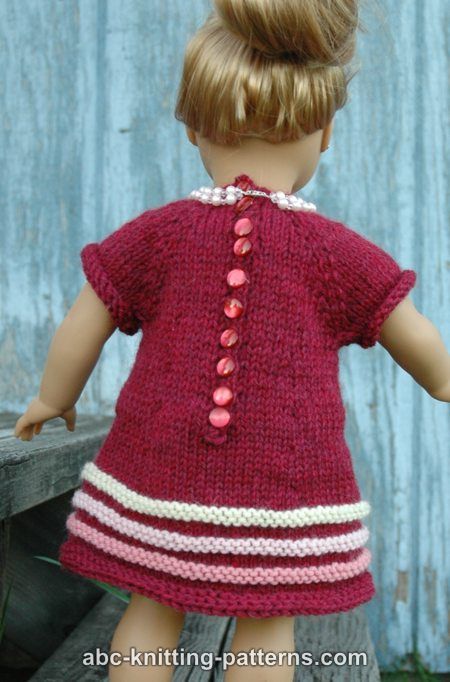
This dress is knitted seamlessly from the top down, using primarily stockinette stitch. The sleeves feature raglan construction. As an accent, I added 3 colored bands to the hem using reverse stockinette stitch. This gives them something of a 3-D look and also contributes to shaping the skirt. You can omit them altogether, or just knit them in the same yarn as the rest of the dress if you would like them to stand out less.
I used crochet to make the button band at the back of the dress, just because this method is the easiest for me. There are different ways to do this, however, so feel free to use your favorite!
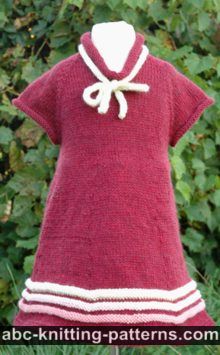
The Girl's Old-Time Raglan Banded Dress is a matching dress for the girl who happens to own the doll.
Skills Required/Techniques Used:
-Knit & purl, cast on & bind off
-Increasing
-Working in the round on double pointed needles
-Picking up stitches
Materials:
Notions: yarn needle, 7 stitch-markers, 2 pieces of waste yarn 12" long, 10 small buttons, sewing needle and thread of matching color
Needles: #7 (4.50 mm) circular needles and doble pointed needles (dpn) OR SIZE NEEDED TO OBTAIN GAUGE
Hook: F (3.75 mm)
Gauge for stockinette stitch: 18 st x 24 rows = 4" x 4" (10 x 10 cm).
Abbreviations:
k - knit
p - purl
pu&k- pick up and knit
m1 - make 1 increase - I used the increase described by Elizabeth Zimmerman: make a backward loop over the right-hand needle and in the next row/round purl/knit as a regular stitch.
pm - place marker
sm - slip marker
st, sts - stitch, stitches
co - cast on
RS - right side
WS - wrong side
sc - single crochet
ch - chain
Stockinette Stitch in rows:
Row 1 (RS): knit
Row 2 (WS): purl
Repeat rows 1-2.
Stockinette in rounds: all rounds knit.
Garter Stitch in rounds:
Round 1: knit
Round 2: purl
Repeat rounds 1-2.
The selvedge/edge stitches are worked as follows: slip the first stitch knitwise and purl the last one.
Raglan increases: Increase for raglan by making 1 st (m1) on each side of indicated, marked, stitch in every right side (RS) row: m1, sm (slip marker), k1 (raglan st), m1.
Directions
The dress is worked top-down back-and-forth with raglan sleeves and opening on the back to the hip line, then the skirt is worked in the round. The sleeves are worked on dpn in the round. The button band is crocheted.
With yarn A cast on 26 sts and purl one foundation row, check the stitches and place 4 stitch markers: 1 edge st, 3 st (right back), 1 st (first raglan line, place the first marker before this st), 4 sts (right sleeve), 1 st (second raglan line, place the second marker before this st), 6 sts (front), 1 st (third raglan line, place the third marker before this st), 4 sts (left sleeve), 1 st (forth raglan line, place the forth marker before this st), 3 sts (left back), 1 edge st.
Row 1 (RS, increase row) and all RS rows: sl1, *knit all sts till the marker, m1, sm, k1, m1 - repeat from * 4 times, knit the remaining sts to the last one, p1. (+8 sts), After row 1 =34 sts.
Row 2 (WS): sl 1, purl all sts.
Repeat rows 1-2 eight more times.
After row 3 the number of sts = 42 sts
After row 5 - = 50 sts
After row 7 - = 58 sts
After row 9 - = 66 sts
After row 11 - = 74 sts
After row 13 - = 82 sts
After row 15 - = 90 sts
After row 17 - = 98 sts
Divide for sleeves and bodice:
Remove markers while working this row
Row 19 (RS): sl1, k13, transfer the next 22 sts to a piece of waste yarn, co 3, k26, transfer the next 22 sts to a piece of waste yarn, co 3, k13, p1. (= 60 sts)
Row 20 (WS): sl1, p59
Row 21 (RS): sl1, k58, p1.
Repeat rows 20-21 six more times. Repeat row 20 one more time.
Row 35/round 1 (RS): k5, pm #1, k10, pm #2, k10, pm #3,k9, pm #4,k10, pm #5, k9, pm #6, k6. Join and continue to work in rounds. Place the seventh marker at the beginning of the round, this marker will not be mentioned further, slip it while working.
Round 2 (increase round): k5, m1, sm, (k10, m1, sm) twice, k9, m1, sm, (k10, m1, sm) twice, k6. (=66 sts)
Round 3: knit all sts, slip markers while working.
Repeat round 3 four more times.
Round 8 (increase round): k6, (sm, k1, m1, k10) twice, sm, k1, m1, k9, (sm, k1, m1, k10) twice, sm, k1, m1, k5. (=72 sts)
Round 9: knit all sts, slip markers while working.
Repeat round 9 four more times.
Round 14 (increase round): k6, m1, (sm, k12, m1) twice, sm, k11, m1, (sm, k12, m1) twice, sm, k7 (=78 sts)
Round 15: knit all sts, slip markers while working.
Repeat round 15 four more times.
Round 20 (increase round): k7, (sm, k1, m1, k12) twice, sm, k1,m1, k11, (sm,k1, m1, k12) twice, sm, k1, m1, k6. (= 84sts)
Round 21: knit all sts, remove all markers except the one in the beginning of the round.
Repeat round 21 three more times.
Round 25 (change to yarn B): knit
Rounds 26-27: purl
Rounds 28-30 (with yarn A): knit.
Repeat rounds 25-30 two more times, first with yarns C and A, then with yarns D and A.
Work 4 more round in garter stitch. Bind off.
Sleeve
Sleeves are worked in rounds on dpn.
Transfer 22 sleeve sts from the waste piece of yarn on dpn, distributing them evenly, pu&k 3 sts over the 3 underarm sts. Mark the beginning of the round. Work 6 rounds in stockinette (all rounds knit). Bind off.
Finishing:
Attach yarn at the bottom of the back openning and crochet 1 row of sc along the left back edge up to neckline, make 40 sc, turn and crochet back: *ch 2, skip 2st, sc 2, repeat from * 10 times.
Weave in all yarn ends.
Sew on 10 buttons on the right back edge.
Enjoy!
Pattern was updated on October 16, 2018.

| Patterns: | Knit >> Doll Clothes |
| Difficulty Level: | 2-Easy |
| Technique: | Seamless Top-Down |
| Yarn Weight: | Worsted |
| Yarn Brand: | Knit Picks |